Thursday, August 13, 2015

Vile Cosplay

My husband began working on his Vile cosplay around a year and a half ago. Due to life getting in the way he wasn't able to dedicate too much time on it until recently. He was determined to finish it for Otakon this year and after working on it for a couple months he was able to finish it (despite the puppy)!

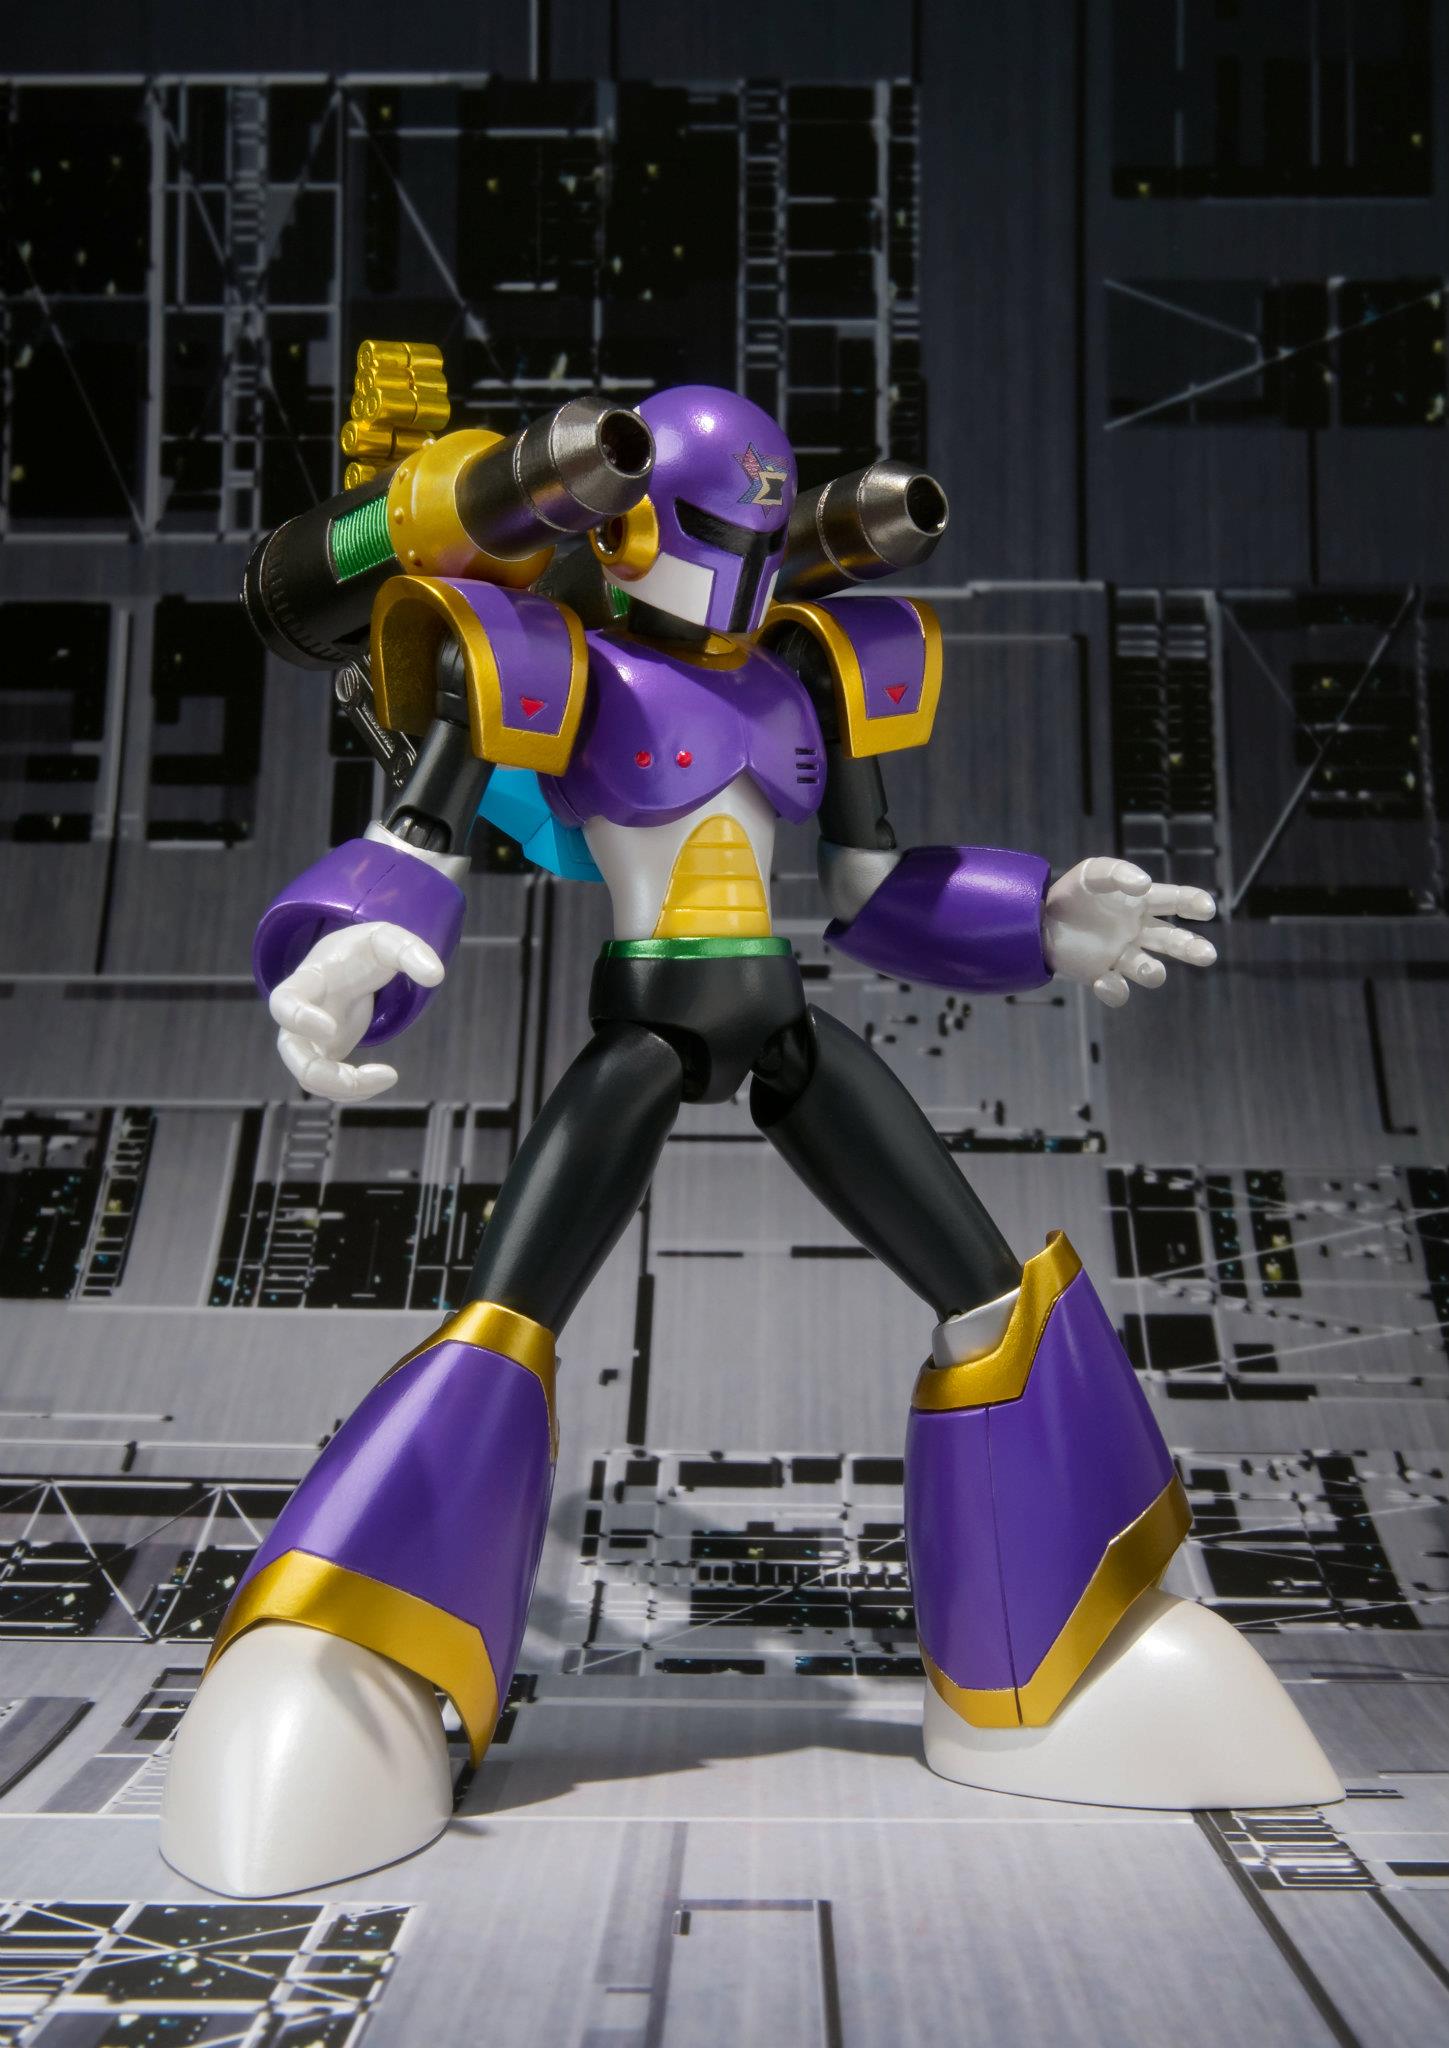
He wanted to do a cosplay of a Mega Man character and chose to do Vile. If you're not familiar with the Mega Man universe, Vile is Maverick Hunter (kind of like Boba Fett in Star Wars) and is a reoccurring protagonist to Mega Man. Vile's appearance changes slightly in each Mega Man game, so my husband chose the outfit he wore in Mega Man X. He based most of the design and measurements off of a Vile figure he has.

 
(via)


After a lot of hard work, he was able to get the results he wanted on the cosplay and was done in time for Otakon! He somehow managed to wear it for about three hours, and got halfway across the convention center.
 
It made for some good pictures though!


 I was able to help him a bit and sewed together the white, yellow, and green band that he wore around his waist. I wish I could say I helped more, but he's not to keen on getting help unless he absolutely needs it. I can't blame him though, I'm the exact same way.
 
Update: One of our friends was able to catch a picture of him from behind. He spent a lot of time working on the backpack and figuring out how to attach the gun to the costume.
 
 
He was also able to get working lights in the gun, chest plate, and helmet of his costume. It's a little hard to see from the pictures, but it was pretty cool in person.
 
 
Even Maverick Hunters need a break.


Friday, August 7, 2015

Dressed to Impress?

Sorry for the wait everyone! Apparently trying to handle work, housework, a new puppy, and cosplaying makes it near close to impossible to blog. No spare time, you know? But, the good news is that Otakon is over, and I now have tons of time to get off my butt and share with you!

My cosplay didn't end up quite as well as I hoped, but I'm pretty sure I mentioned my ridiculous high standards before.

A brain in a jar only a mother could love
 

Here's a side by side so you can see the comparison:


Only four people recognized me while I was walking around (my fault for picking such an obscure character), but that's actually more than I thought! I had a lot of people take my picture, and A LOT of people that stared at me in either wonderment or horror.
 
I hope horror!
 
Though the suit was a little hot, the only issue I really had with the costume was trying to see through the green in the jar. I had a layer of see-through fabric the same color as the jar's "liquid" that hid my face. It did a good job covering my face in photos and while I walked around, but it was like looking though lime jello.
 
I wasn't able to get a shot of my backpack, but trust me it's there! I'll have to see if we thought to get any shots from behind. I'll look through my many pictures of the convention and see what I can find to share!

 
Next up will be a shot of my husband's cosplay. We were able to get a lot more pictures of his character then we were of mine.


Saturday, May 16, 2015

Look! A puppy!

My husband and I have been looking to get a new puppy for almost a half a year. My husband has really bad allergies to dandruff, so it was quite a hassle trying to find a hypoallergenic dog (that was indeed hypoallergenic). After months of waiting to hear about our puppy request, we were a little blind-sighted when we heard that a little furball was available. Dropping everything, we went to the store and picked up the essentials we didn't already have. The next day we came home with a new fluffy family member!


How am I going to finish my cosplay
with this cutie to love?

In case it's hard to tell, he's a Samoyed puppy. He's only two and a half months old in this picture, so he'll be really big once he's fully grown! (I hope I'm ready!)

We've had him for a little over a week now, and he's starting to answer to his wonderfully perfect name:

Hell Yeah!


Oh yes, he was named after the beautiful and unique Capcom/Clover Studios game, Okami! Okami means "Wolf God" or "Great Spirit" in Japanese. The game tells the story of the Japanese Shinto Sun Goddess, Amaterasu. She takes the form of a white wolf and uses a Celestial Brush to expel evil demons who have taken over Japan. This game is an amazing mix of Japanese history and mythology styled after Japanese oil paintings.

The best part (besides being able to have him as a member of our family) is that we'll have a costume ready for him every year!

Please don't look at me like that.

Here's another one, because I'm going to be one of those types of pet owners!


Camouflage!

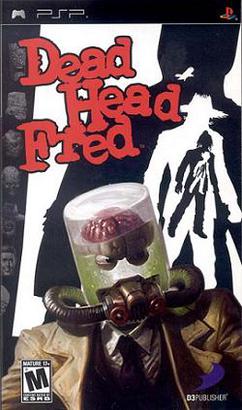
After we get him a little more familiar with our household and schedule, I'm going to start working on my Dead Head Fred cosplay again. It's not until the end of July, so I still have time. No more distractions!

Okay, one more. . .

Wednesday, April 29, 2015

Just a little head

My husband and his friends go to Otakon, an Anime Convention, every year and I've always been invited to join them. Usually I don't go to conventions unless I'm able to cosplay. When else besides Halloween can I walk around in crazy costumes and have people not think I'm weird? (I mean, besides the people that know me personally.)

Unfortunately, I haven't had the time to sit down and really work on an awesome costume until now. With the house more organized and most of our boxes unpacked, I'm running out of excuses. I decided to try and work on an insanely hard cosplay outfit, based off a video game I fell in love with a couple years ago.

Don't tell my husband. . . 

In the game, Fred Neuman a murdered private investigator is reanimated by a scientist to find his killer Ulysses Pitt, a mob boss who runs Hope Falls, New Jersey. The scientist is forced by Ulysses to give Fred's head up, but he's able to save the brain, eyes, and body from being tossed. As Fred moves through the game, he's able to collect other heads that endow him with different abilities. It's a dark comedy game that takes a lot of humor from the detective noir movies from the 1940's. The best part of the game is that Fred is voiced by John C. McGinley, who played Dr. Cox in the TV show Scrubs. His voice acting abilities really adds a lot of humor to such a dark premise! 

Anyhoo, back to the outfit. Making a cosplay of a person with a brain in a jar is a lot of work, so I'll try to keep you posted on my progress as I go along. So far I've been able to finish a prop for the costume that I'm going to carry around with me. In the game he collects a shrunken head that enables him to shrink to fit through small compartments. 

It's super creepy with the eyes open

I looked online for a base that I could use to start the process. There were a couple different variations of plastic shrunken heads online (surprisingly). They all required a bit of work to get it looking the way I wanted, so I bought the cheapest one (in case I messed up the first time).

Not even close

You can see how much work was needed to make this head look like the shrunken head in the game. I removed the hair and cords first so I had a blank slate to work with. Carefully using a xacto knife I removed the nostrils of the nose and shaved down the bridge of the nose.

I had to find a clay that would air dry, but still be bendable with the soft plastic the head was made of. I used the Creatology Air Dry Clay from Michaels. This clay may not be good for some projects, but it's good when you require a non-toxic clay that can be glued and painted when dry. This clay will usually require glue when adhering it to other surfaces.


I usually use yarns when I'm working on hair in projects because it's a lot cheaper and plentiful. Now that there are so many varieties of yarn out there, most people should be able to find a similar texture or size for the project they need. I did make the mistake of not bringing a picture of the shrunken head with me when I went perusing through the yarn aisle. The yarn I ended up buying served the purpose pretty well, but wasn't as similar as this perfectionist wanted.

Close, but no cigar

After a couple of hours of working with the shrunken head, I finally got it to the point where it looked as close as I could make it.


You talkin' to me?

I was happy that I was able to get the angry look that the shrunken head has in the video game. Since he's really no bigger than the palm of my hand I didn't go for as many details as the head has in the video game. I cut out a lot of wrinkles and the cheekbones so I could start on the other parts of the cosplay. I usually like to try and make all my crafts as close I can and it was difficult for me to put it down and move on.

Here's a side by side comparison of the heads so you can see how close I got it!

 If you squint your eyes really hard you can see it 

Once I'm done with a few more items in the cosplay I'm going to go back and add some more hair to it. When I was working on it, I cut out the extra layer to save some time, but he really does need it. I'll update the post with the extra hair once I add it. 
Monday, April 6, 2015

Repotting seedlings

I started planning for my garden a little early this year. Because my husband and I moved into a new house over the winter, I wasn't sure how the new surroundings would affect my plants. I started sowing the seeds in a little plastic seedling greenhouse in our kitchen, and boy they have grown!


Okay, I admit it, this isn't the plant.


A lot of them have already grown past the point where they should have been repotted, but I've been busy unpacking and setting up the house. Since I didn't want to kill them before they even had a chance to really live, it came down to a do or die situation this weekend. . . at midnight.

In Virginia, the soil isn't ready yet for planting anything (it's still a little too cold and windy) and I need a few more weeks before moving them outside. I bought some larger seedling pots to house the new plants, in hopes of buying myself a little more time. 


My hero


These starter pots are a lot better for big seedlings, and are usually about the size of a 3-inch terra cotta pot. The seedlings were growing in a 1-inch plot of soil, so these pots will still run a little large for them. When you're repotting plants, it's usually best to move to a pot that is an inch bigger than the pot it was in previously (depending on the type of plant). This gives the plant room to grow it's roots, while still focusing on leafing and blooming. If you put it in too big of a pot, it'll spend all it's energy in root growing.

I was only able to find biodegradable pots in the size I needed, so I figured out how to work with both pots. Before you start working on anything, you'll want to trim off the connecting tops of the biodegradable pots. Then start soaking them in water so they'll be nice and wet when you need them.

Using the soil, get it wet enough to be moldable. You want it to be a little clay-like in your hands to make sure you can manipulate it properly. Work with the soil until you're able to get it up on the sides of the pots, leaving the middle part open.


If it's a little crumbly near the top that's okay. 
You just want the bottom part to have a good amount of soil.


Now that the containers are ready, you can start pulling the biodegradable pots out of the water and putting them into the larger containers. If there doesn't seem to be enough space, pull them out and get the soil just right.


First try: Failed! 


You'll notice that my biodegradable pots aren't really wet enough. When you're repotting, you want to have a lot of moisture in the soil and with the plant. Repotting is a very stressful event for a plant to go through and the wetter the process the better. After they're successfully potted, you can usually give them almost a whole week before they need to be watered. That does depend on the plant, so you'll want to look at what it requires. (You'll get better on the water/soil ratio the more you do this.)

When you're finished with the biodegradable pots, use a toothpick/fork/sharp tool and poke a few holes around the sides of the cardboard. (You only need a few, and don't poke the bottoms!) 

From here you can start adding soil and moving the plants over one by one. Make sure to be super careful and make sure not to bury them in too much dirt. You want the roots to have room to grow.


Roomy


And a beauty shot:


That's a lot of cucumber


After the plants are successfully repotted. Add a little bit of water to the top of the soil and move them into a sunny location. I did this at night (really coming in under the wire) so they had to wait for sun until the morning. I had to improvise with the plastic spoons and sharpies too. I couldn't find my popsicle sticks in my boxes and this had to be done. They actually don't look bad though, so I may keep them as long as the sharpie holds up.

Friday, April 3, 2015

From the top (or side, or across the hall)

Beginning a blog is never easy, especially since I'm currently talking to no one.


Hello!


Nevertheless, I'm going to give it a shot!  As an avid crafter, most of my projects range from nerdy to super nerdy (with a little bit of normal thrown in).  I also enjoy cooking/baking, sewing, and gardening, so I may eventually cover a wider range of topics than just my geekery.  I've tried to record a lot of projects I've completed in the past in the hopes of eventually sharing them in a blog of my own.  I have boxes full of crafting supplies and many ideas shuffling around in my head, so hopefully I can share them with you!  That's right, I'm still talking to no one.

Since this is just an opening post, I'll try to keep it short. If you somehow find me in the sea of blogs and decide to stick around, please keep an eye out for future projects, posts, and more!